
Setting Up Unity's Localization Package
In Part 1 we picked the official Localization package. Now we wire it up.
Most tutorials stop at "drag a component onto your text, pick a key, done." That covers static labels — a title that says "Settings" and never changes. But real UI reuses the same text element for different messages: one popup that shows a welcome, then a goodbye, then an error, depending on what happened.
So this post does two things: the fast setup, then the part tutorials skip — changing which table and key a component points to at runtime, and refreshing the view.
Fast setup (the parts you can't skip)
If you've done this before, skim to the next section. Otherwise, three steps.
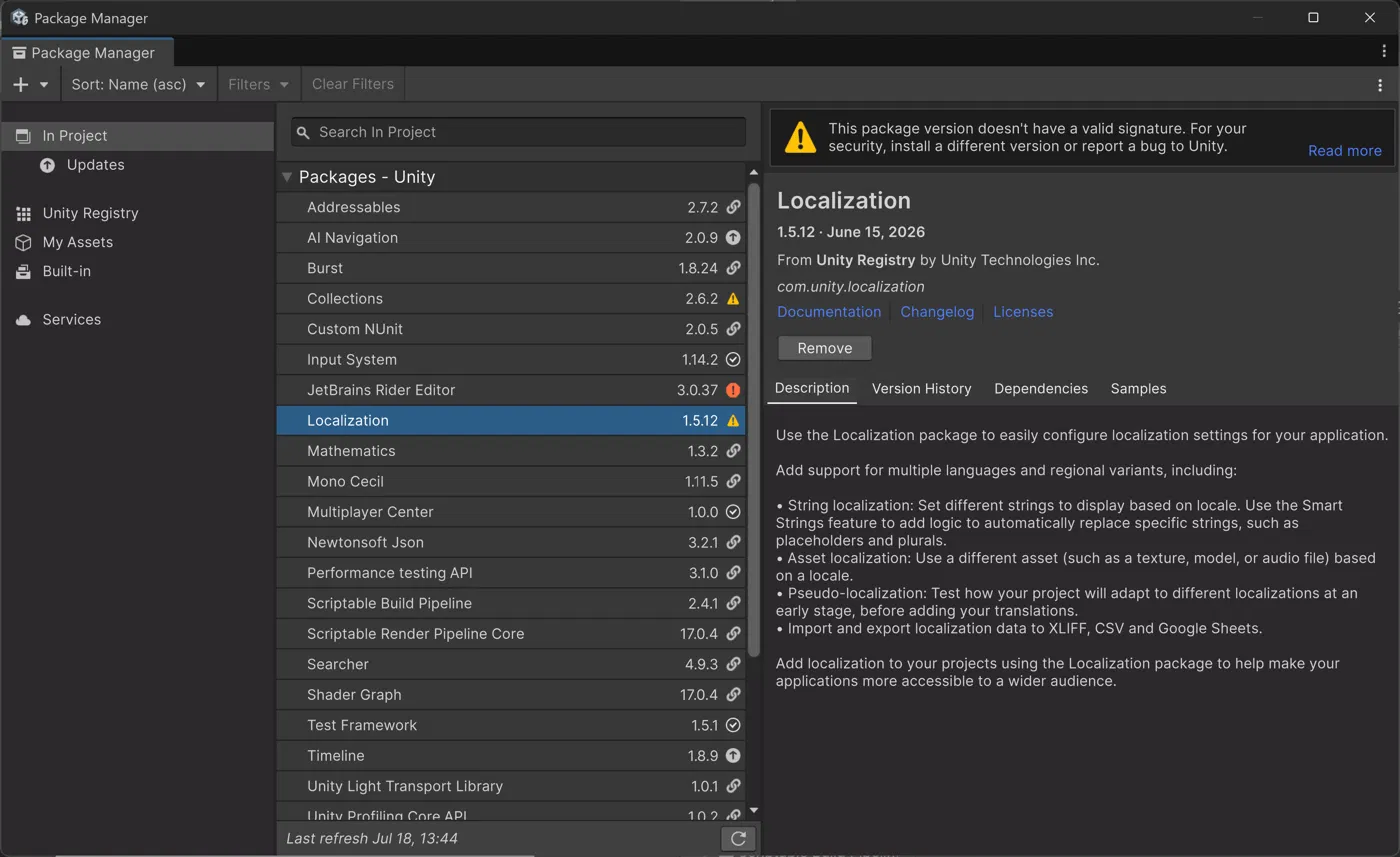
1. Install the package. Package Manager → search "Localization" → Install.
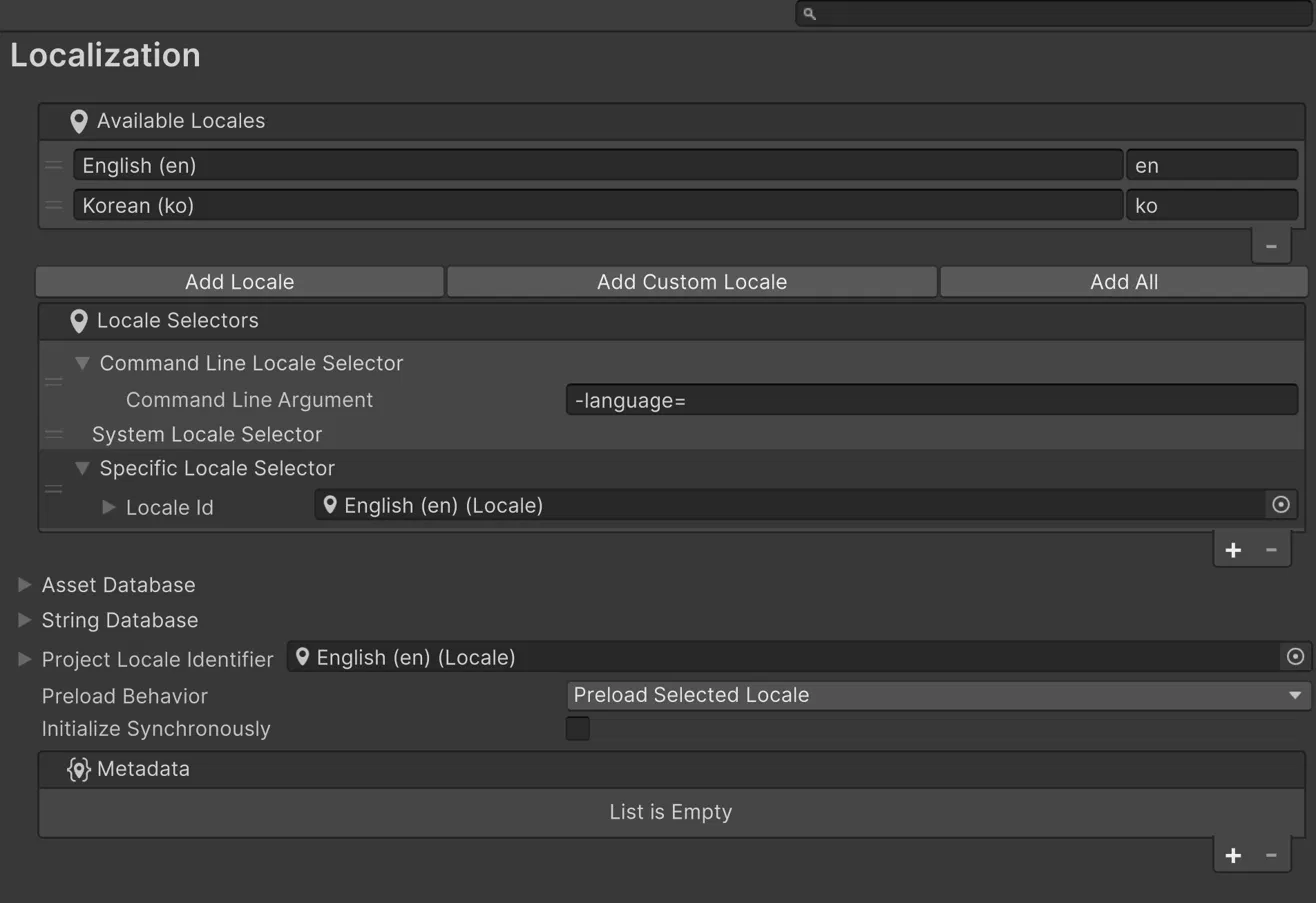
2. Create Localization Settings and add your Locales. Edit → Project Settings → Localization → Create. This asset holds your whole localization config. Then, under Available Locales, add a locale for each language you support — click Add Locale and pick them. I'm using English (en) and Korean (ko).
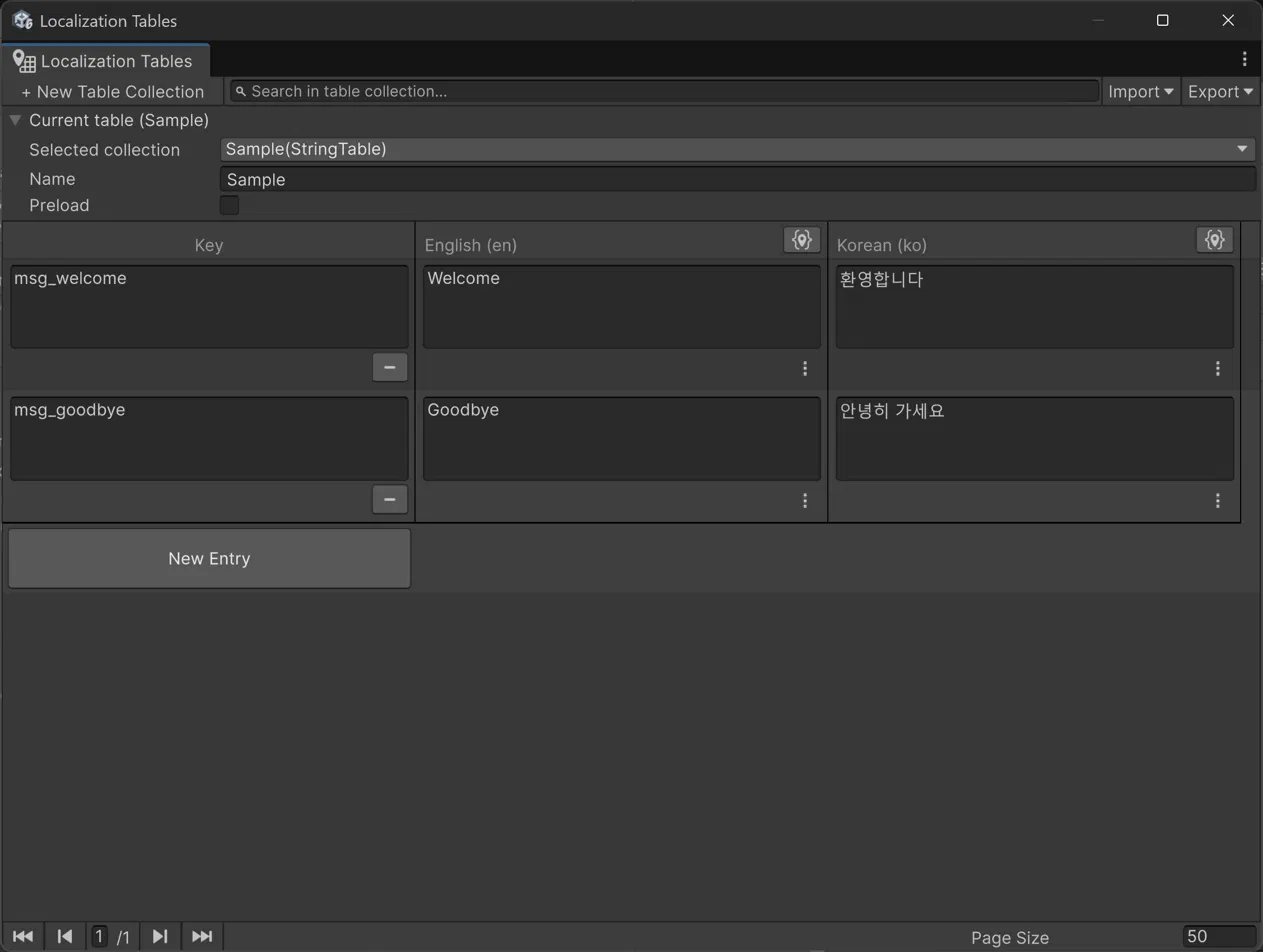
3. Create a String Table Collection. Window → Asset Management → Localization Tables → New Table Collection. This is your translation database — one row per key, one column per locale. I named mine Sample and added two entries, msg_welcome and msg_goodbye, with English and Korean values for each.
 That's the foundation. Now the actual UI.
Static binding: the standard way
Add a TextMeshPro - Text (UI) object, then add the Localize String Event component to it (Add Component → Localization → Localize String Event).
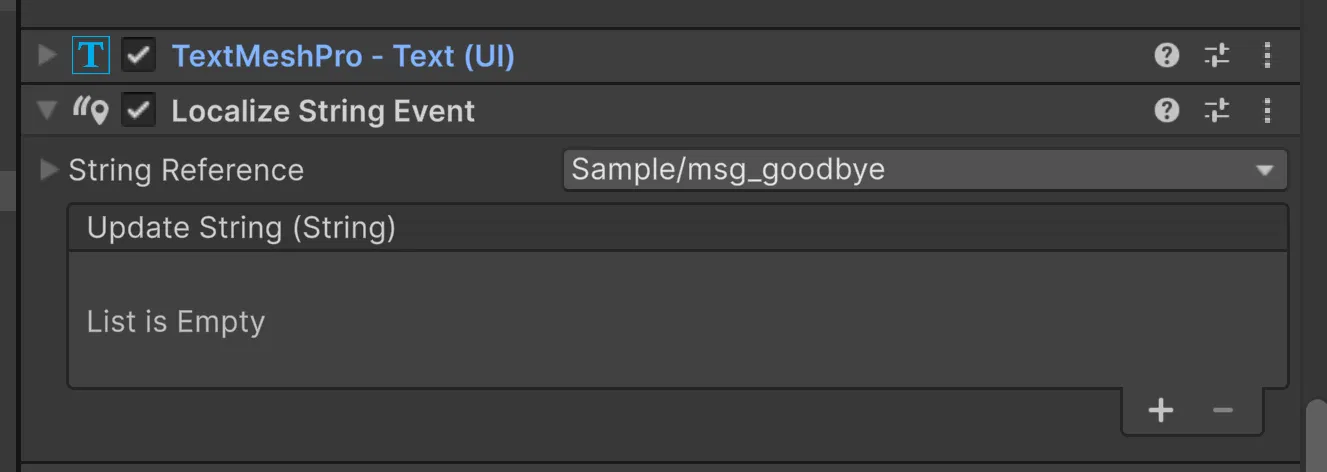
Set the String Reference to a table and entry. Click the dropdown and you'll get a picker showing every entry in the collection.
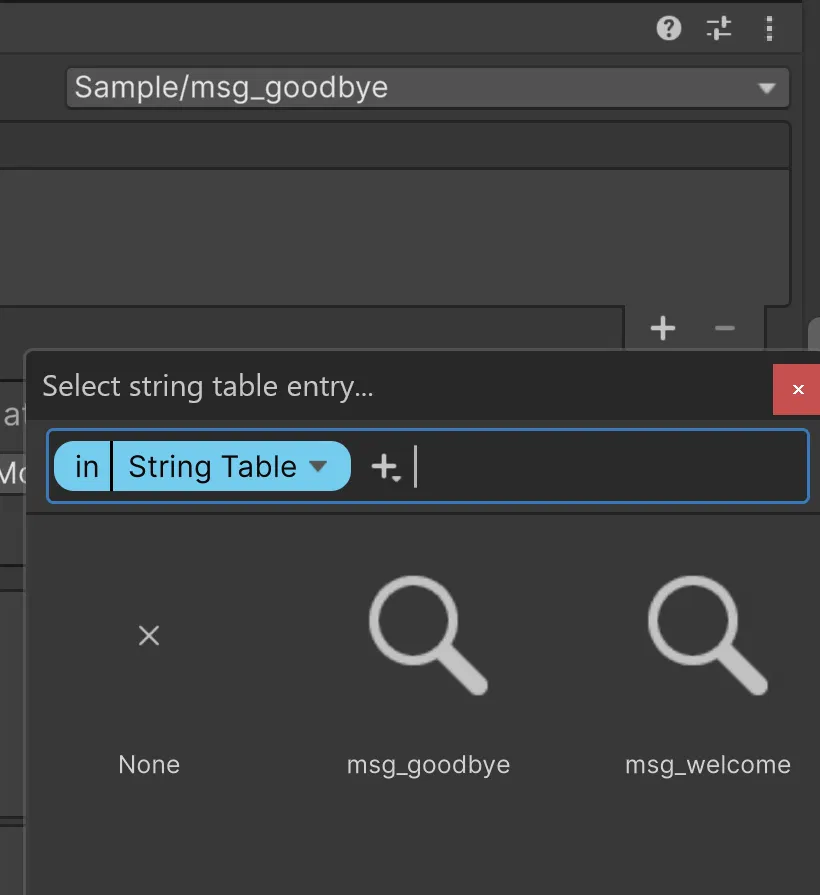
Pick one, press Play, switch the active locale, and the text updates automatically. No code.
This is where most tutorials end. It's also where most real projects hit a wall — because that key is now baked into the component. What if the same text element needs to show msg_welcome sometimes and msg_goodbye other times?
Dynamic binding: change the key at runtime
Here's the part worth reading. LocalizeStringEvent exposes its StringReference, and you can repoint it in code — swap the table, the entry, or both — then refresh.
using UnityEngine;
using UnityEngine.Localization.Components;

[RequireComponent(typeof(LocalizeStringEvent))]
public class DynamicPopupText : MonoBehaviour
{
    private LocalizeStringEvent _localizeEvent;

    private void Awake()
    {
        _localizeEvent = GetComponent<LocalizeStringEvent>();
    }

    /// <summary>
    /// Repoint the same text component at a different table/key, then refresh.
    /// </summary>
    public void ShowMessage(string tableName, string entryKey)
    {
        // Swap both the table reference and the entry in one call.
        _localizeEvent.StringReference.SetReference(tableName, entryKey);

        // Without this, the swap won't reach the screen — see below.
        _localizeEvent.RefreshString();
    }
}
Wire two buttons to it:
// Button "ChangeWelcome"
popup.ShowMessage("Sample", "msg_welcome");

// Button "ChangeGoodbye"
popup.ShowMessage("Sample", "msg_goodbye");
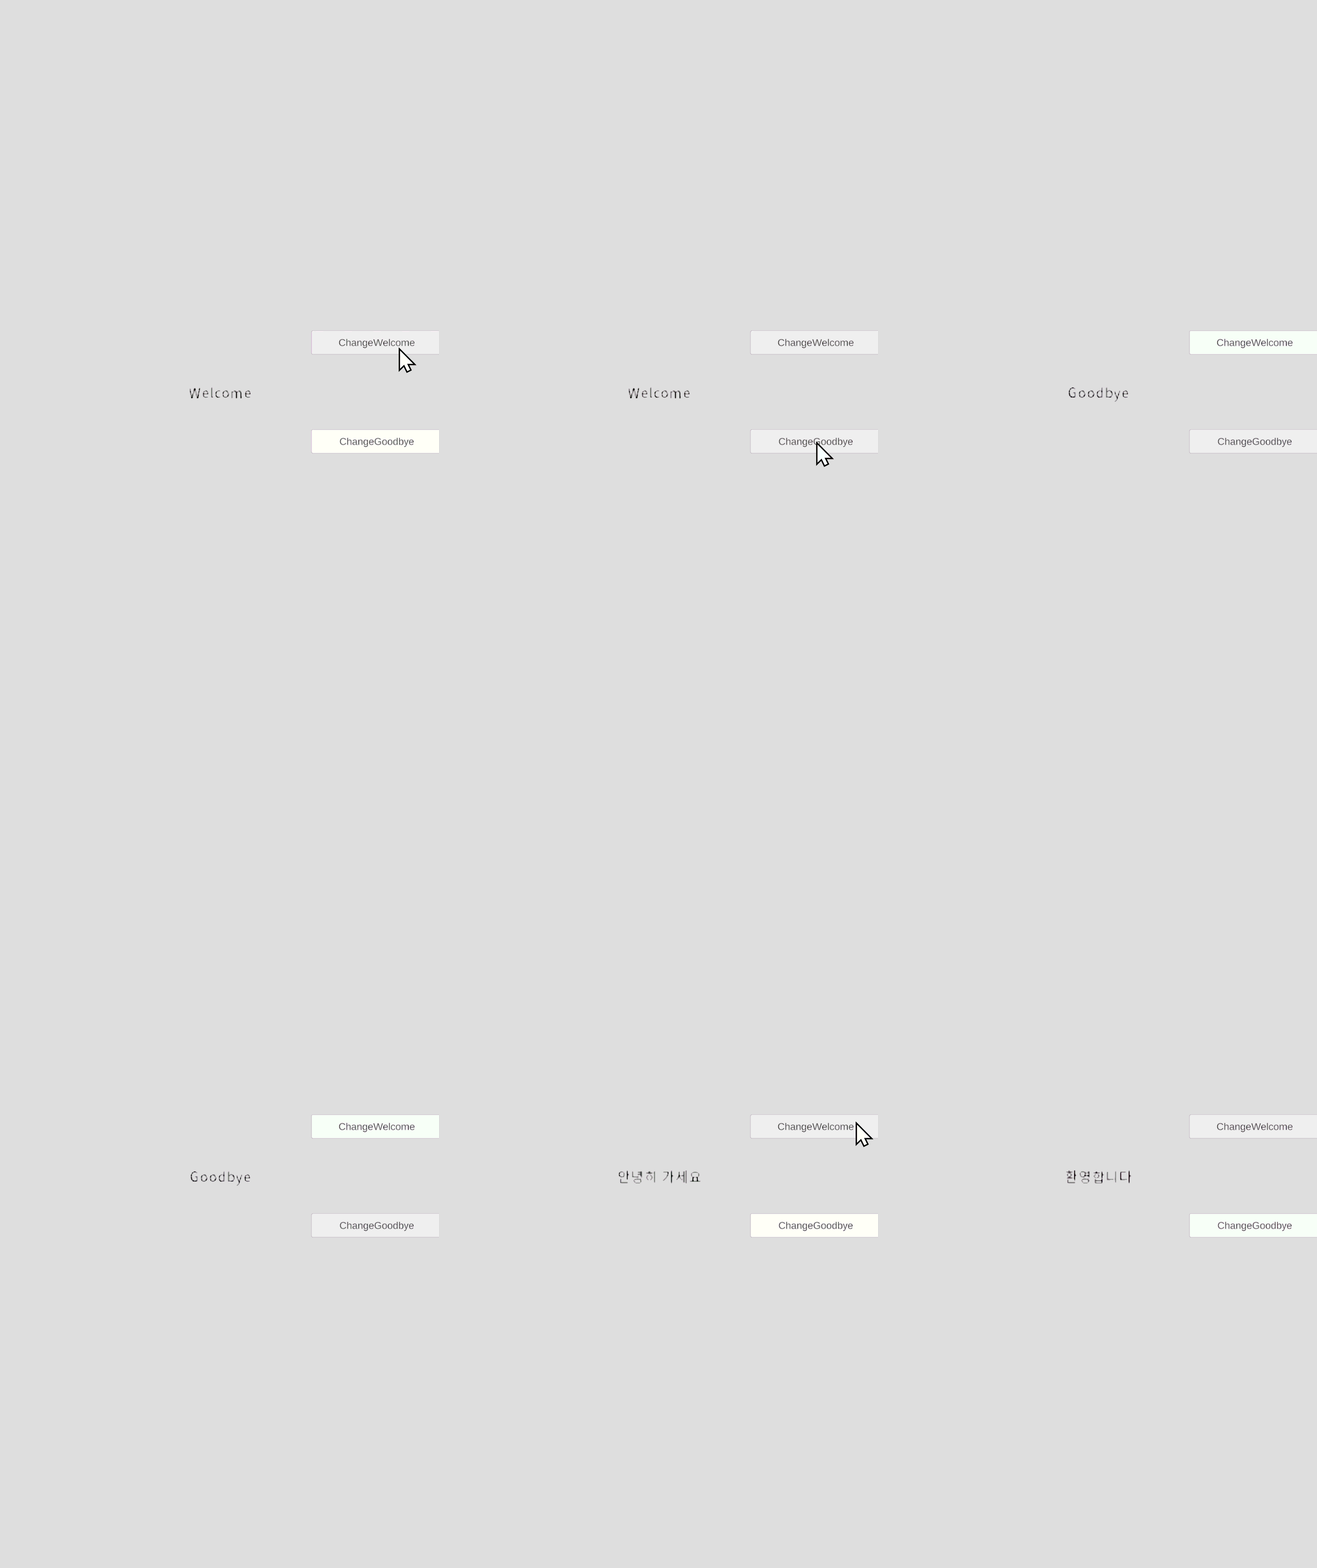
Now one text element serves both messages, chosen at runtime. Press one button, it reads "Welcome"; press the other, it reads "Goodbye" — and both stay fully localized, so in Korean they'd read "환영합니다" and "안녕히 가세요" with zero extra code.
The two gotchas that will confuse you
This is exactly the stuff the "drag and drop" tutorials never mention.
1. SetReference without RefreshString does nothing visible. If the string was already loaded and displayed, changing the reference doesn't automatically re-push it to the label. You have to call RefreshString(). People spend an hour here convinced the swap "didn't work" when the reference actually did change — it just never got rendered.
2. The value arrives asynchronously. Localized strings load through an async operation and come back via the component's Update String event. So you can't call RefreshString() and read the final text on the very next line — you may still get the old value. If you need the resolved string in code, subscribe to the string-changed event or await the load handle instead of reading it synchronously.
// Get notified when the new value is actually ready.
_localizeEvent.OnUpdateString.AddListener(newValue =>
{
    Debug.Log($"Now showing: {newValue}");
});
Neither of these is in the docs' happy path, and both cost real time the first time you hit them.
When to use which
- Static (inspector) binding — labels that never change identity: menu titles, button captions, settings names. Set the key once, done.
- Dynamic (runtime) binding — one element, many messages: popups, toasts, dialogue, error banners, tutorial hints. Repoint in code.
Most screens use both. Don't force everything through code — inspector binding is less to maintain when the text is fixed.
What's next
We now have text that localizes and can change at runtime. But every string still lives inside Unity, which means you are the only one who can edit translations. The moment a translator is involved, that breaks down.
Part 3 connects the String Table to Google Sheets, so translations live in a spreadsheet your translator owns — and I'll cover the parts that actually break: OAuth vs. Service Account, the column-order gotcha that makes Pull silently do nothing, and removeMissingEntries quietly deleting your work.
That column-order bug cost me an afternoon. Part 3 makes sure it doesn't cost you one.
Previous: Part 1 — Choosing an approach · Next: Part 3 — Google Sheets sync →